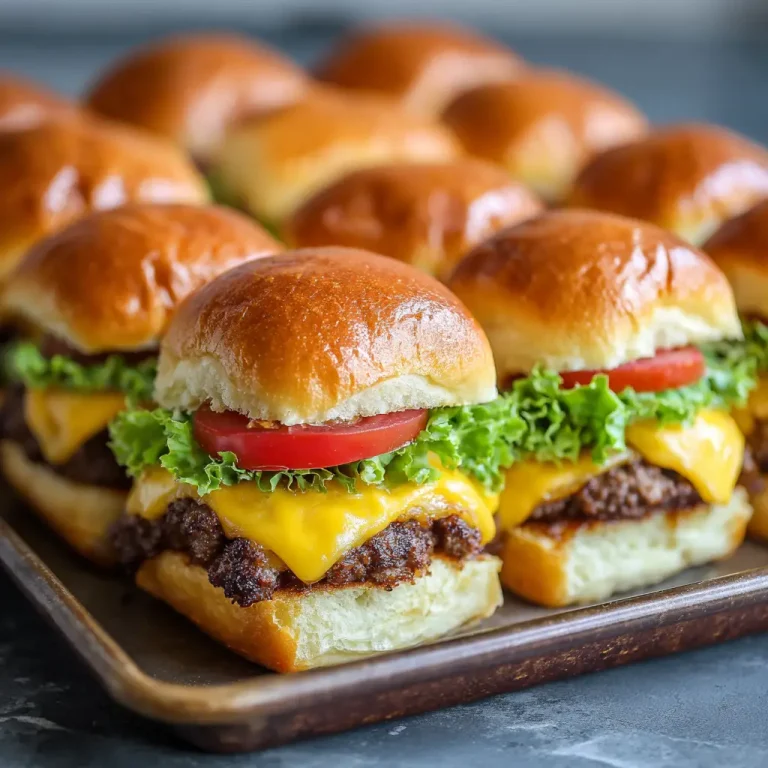
Cheeseburger Sliders Oven Baked
Cheeseburger sliders oven baked are the ultimate comfort food for family dinners, parties, or casual gatherings. These bite-sized burgers pack all the flavors of a juicy cheeseburger in a soft, buttery roll that’s baked to golden perfection. They’re fun, customizable, and guaranteed to be a crowd-pleaser.
This recipe is easy to prepare, requires minimal cleanup, and serves multiple people at once, making it a great option for busy weeknights or festive occasions. Oven-baked sliders eliminate the need for grilling, while still giving you that cheesy, savory flavor everyone loves.
Whether you’re preparing them for game day, a potluck, or a weekend treat, these cheeseburger sliders will quickly become a go-to dish that satisfies every craving.

Ingredients List
– 2 lbs ground beef (80/20 blend recommended)
– 1 medium onion, finely diced
– 2 tablespoons olive oil
– 2 cloves garlic, minced
– 1 teaspoon salt
– 1 teaspoon black pepper
– 1 teaspoon Worcestershire sauce
– 12 Hawaiian sweet rolls or dinner rolls
– 10–12 slices American or cheddar cheese
– ½ cup pickles, sliced
– ½ cup ketchup (optional for topping)
– ½ cup mustard (optional for topping)
– 3 tablespoons unsalted butter, melted
– 1 teaspoon sesame seeds (optional)
Step-by-Step Instructions
Step 1: Preheat your oven to 350°F (175°C). Lightly grease a 9×13-inch baking dish or line it with parchment paper.
Step 2: In a large skillet, heat olive oil over medium heat. Add the diced onion and sauté for 3–4 minutes until softened. Add garlic and cook for another 30 seconds.
Step 3: Add ground beef to the skillet, breaking it apart with a spatula. Season with salt, pepper, and Worcestershire sauce. Cook until browned and fully cooked through, about 7–8 minutes. Drain excess fat if necessary.
Step 4: Slice the Hawaiian rolls in half horizontally, keeping them connected as one sheet. Place the bottom half in the prepared baking dish.
Step 5: Spread the cooked beef mixture evenly over the rolls. Layer with cheese slices to cover the meat, then add pickles or condiments if desired.
Step 6: Place the top half of the rolls back on. Brush the tops with melted butter and sprinkle with sesame seeds for extra flavor and presentation.
Step 7: Cover loosely with foil and bake for 15 minutes. Remove foil and bake uncovered for another 5–7 minutes, until the tops are golden brown and the cheese is melted.
Step 8: Remove from the oven, let cool slightly, and cut into individual sliders before serving warm.
Cook Time
Prep Time: 10 minutes
Cook Time: 25 minutes
Total Time: 35 minutes
Servings
Serves 12 sliders
Nutritional Information (approx. per slider)
Calories: 280
Carbs: 20g
Protein: 15g
Fat: 15g
Storage Instructions
Refrigerate leftovers in an airtight container for up to 3 days. To reheat, place in the oven at 325°F until warmed through to maintain crispness. Avoid microwaving for too long as it can make the bread soggy. Freezing is possible for up to 2 months; thaw overnight in the fridge and reheat in the oven.
Pairings/Suggestions
These cheeseburger sliders pair perfectly with fries, onion rings, or a fresh green salad. For party platters, serve alongside chips, coleslaw, or even macaroni and cheese for a full comfort-food spread. You can also experiment with toppings like sautéed mushrooms, jalapeños, or crispy bacon for unique variations.
Seasonal Relevance
Cheeseburger sliders are versatile enough for any season. They’re ideal for summer gatherings when grilling isn’t an option, cozy fall nights at home, winter holiday parties, or spring potlucks. Their universal appeal makes them a year-round favorite.
Health Benefits
While sliders are indulgent, they can be balanced with lean beef or even ground turkey to reduce fat. Using whole wheat rolls and low-fat cheese can make them a healthier choice. The protein from beef and cheese helps with satiety, while portion control with smaller sliders ensures you can enjoy them without overindulging. Adding a side salad also increases the nutritional value of the meal.

Pros and Cons
| Pros | Cons |
|---|---|
| Quick to prepare and cook | Best enjoyed fresh |
| Perfect for parties and gatherings | Can be high in calories if loaded with cheese and toppings |
| Customizable with different cheeses and toppings | Requires baking dish and oven time |
| Kid-friendly and fun to eat | Not ideal for freezing long-term |
Conclusion
Cheeseburger sliders oven baked are the perfect combination of convenience, flavor, and fun. They bring all the joy of a classic cheeseburger in a handheld size that’s ideal for sharing. With melty cheese, savory beef, and soft rolls baked together, every bite is comforting and satisfying.
These sliders are simple enough for weeknight dinners yet special enough for holidays and parties. They’re easy to customize with toppings, making them a recipe that suits every palate. Once you try them, they’ll quickly become a staple in your meal rotation.

Cheeseburger Sliders Oven Baked
Course: Cheeseburger Sliders Recipes12
servings10
minutes25
minutes280
kcalThese oven-baked cheeseburger sliders are loaded with juicy beef, melted cheese, and soft rolls, baked to golden perfection. Quick, fun, and kid-friendly, they’re the ultimate crowd-pleaser for any occasion.
Ingredients
– 2 lbs ground beef (80/20 blend recommended)
– 1 medium onion, finely diced
– 2 tablespoons olive oil
– 2 cloves garlic, minced
– 1 teaspoon salt
– 1 teaspoon black pepper
– 1 teaspoon Worcestershire sauce
– 12 Hawaiian sweet rolls or dinner rolls
– 10–12 slices American or cheddar cheese
– ½ cup pickles, sliced
– ½ cup ketchup (optional for topping)
– ½ cup mustard (optional for topping)
– 3 tablespoons unsalted butter, melted
– 1 teaspoon sesame seeds (optional)
Directions
- Preheat your oven to 350°F (175°C). Lightly grease a 9×13-inch baking dish or line it with parchment paper.
- In a large skillet, heat olive oil over medium heat. Add the diced onion and sauté for 3–4 minutes until softened. Add garlic and cook for another 30 seconds.
- Add ground beef to the skillet, breaking it apart with a spatula. Season with salt, pepper, and Worcestershire sauce. Cook until browned and fully cooked through, about 7–8 minutes. Drain excess fat if necessary.
- Slice the Hawaiian rolls in half horizontally, keeping them connected as one sheet. Place the bottom half in the prepared baking dish.
- Spread the cooked beef mixture evenly over the rolls. Layer with cheese slices to cover the meat, then add pickles or condiments if desired.
- Place the top half of the rolls back on. Brush the tops with melted butter and sprinkle with sesame seeds for extra flavor and presentation.
- Cover loosely with foil and bake for 15 minutes. Remove foil and bake uncovered for another 5–7 minutes, until the tops are golden brown and the cheese is melted.
- Remove from the oven, let cool slightly, and cut into individual sliders before serving warm.
Recipe Video
Notes
- Cheeseburger sliders oven baked are easy, cheesy, and perfect for sharing.They’re quick to prepare and serve a crowd in no time.Great for parties, weeknights, or game day snacks.
FAQs
Q1: Can I use ground turkey instead of beef?
Yes, ground turkey works well as a leaner alternative, though it may require extra seasoning for flavor.
Q2: Can I prepare the sliders ahead of time?
You can assemble the sliders a few hours in advance and refrigerate. Bake just before serving for the best texture.
Q3: Can I make these without cheese?
Absolutely! You can skip the cheese or use dairy-free alternatives to fit dietary preferences.
Q4: What rolls work best for sliders?
Hawaiian sweet rolls are popular for their flavor and softness, but any slider buns or dinner rolls will work.
Q5: How do I prevent soggy sliders?
Drain excess fat from the beef mixture and avoid overloading with condiments before baking. Adding sauces after baking helps keep the bread firm.